Hello Guest!
IP Approval WordPress Instructions
IP Address Approval Credentials
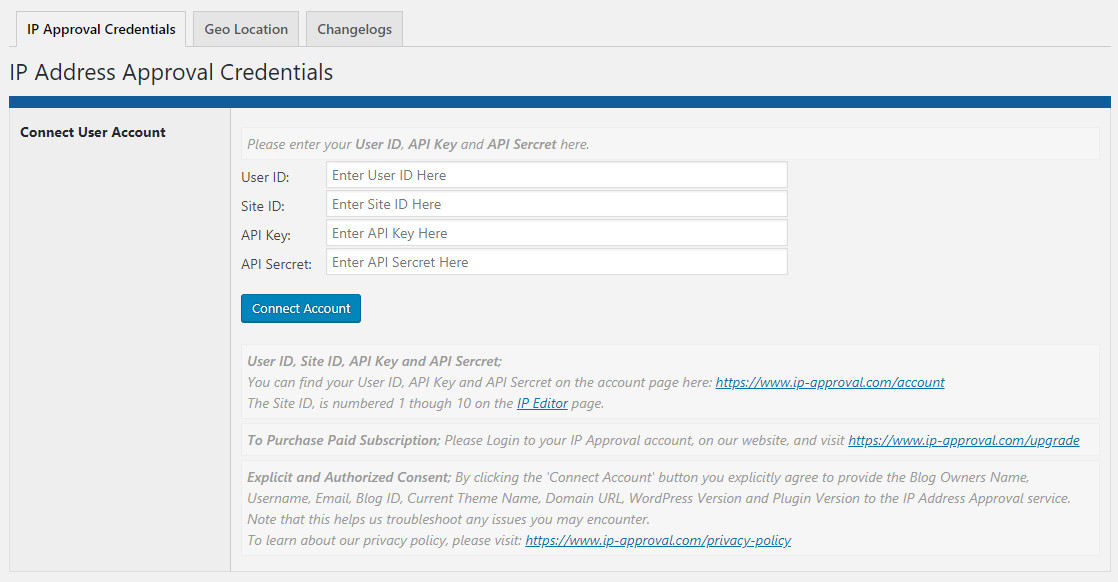
Connect User Account:
Add your User ID, Site ID, API Key and API Sercret, then click the Connect Account Button. Note: You can find your User ID, API Key and API Sercret on the account page here: https://www.ip-approval.com/account Please also note: The Site ID, is numbered 1 though 10 on the IP Editor page. |
Wordpress Site Settings
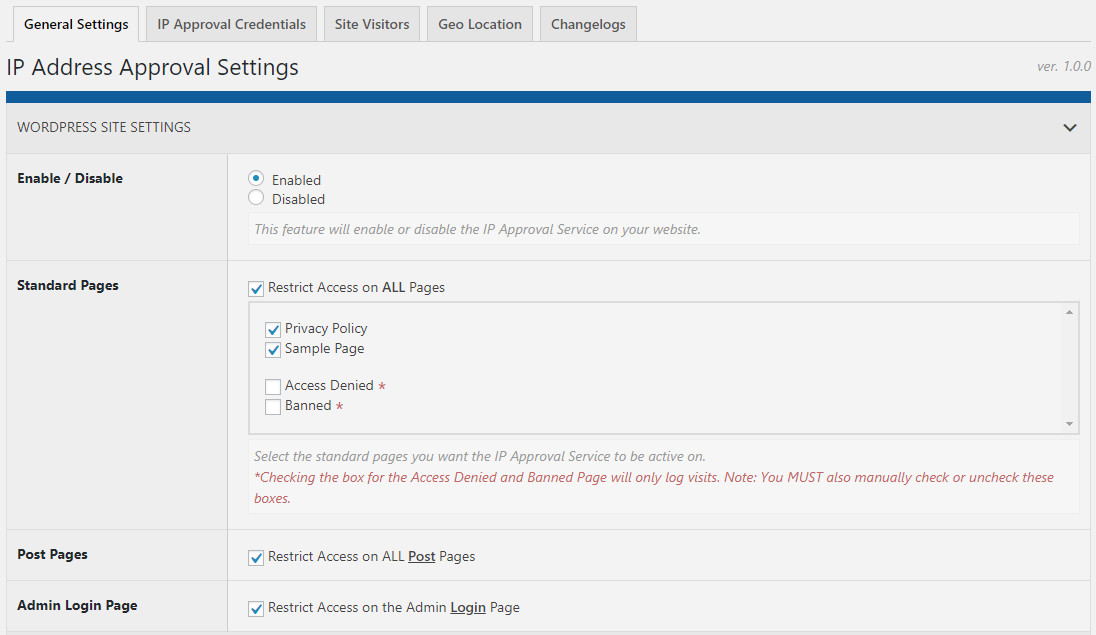
Enable/Disable:
You can enable or disable the IP Approval Service on the entire website. Standard Pages: Choose which of the Standard Pages of your website you would like the IP Approval service to work on. Post Pages: Controls whether or not to add the IP Approval service to the Post pages. Admin Login Page: Check the box to limit access to the WordPress Admin Login Page will only allow visitors listed in the 'Allowed' (Remain Open for) list. |
IP Approval Settings
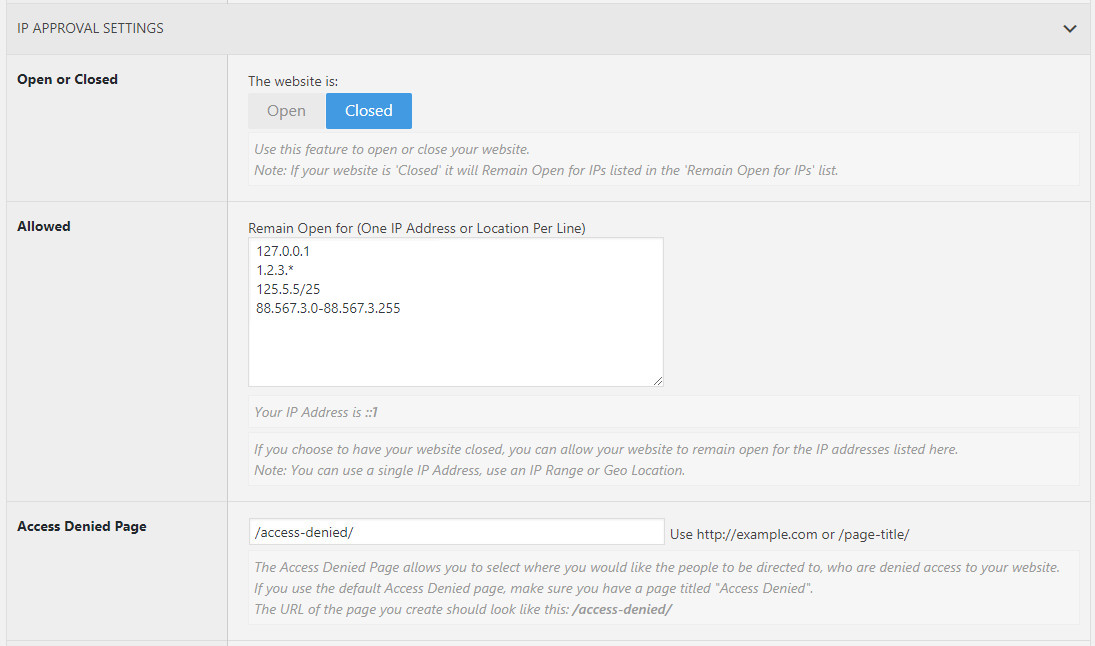
Open or Closed:
Use this feature to open or close your website. Note: If your website is 'Closed' it will Remain Open for IPs listed in the 'Remain Open for IPs' list. Allowed: If you choose to have your website closed, you can allow your website to remain open for the IP addresses listed here. Access Denied Page: The Access Denied Page allows you to select where you would like the people to be directed to, who are denied access to your website. If you use the default Access Denied page, make sure you have a page titled "Access Denied". |
|
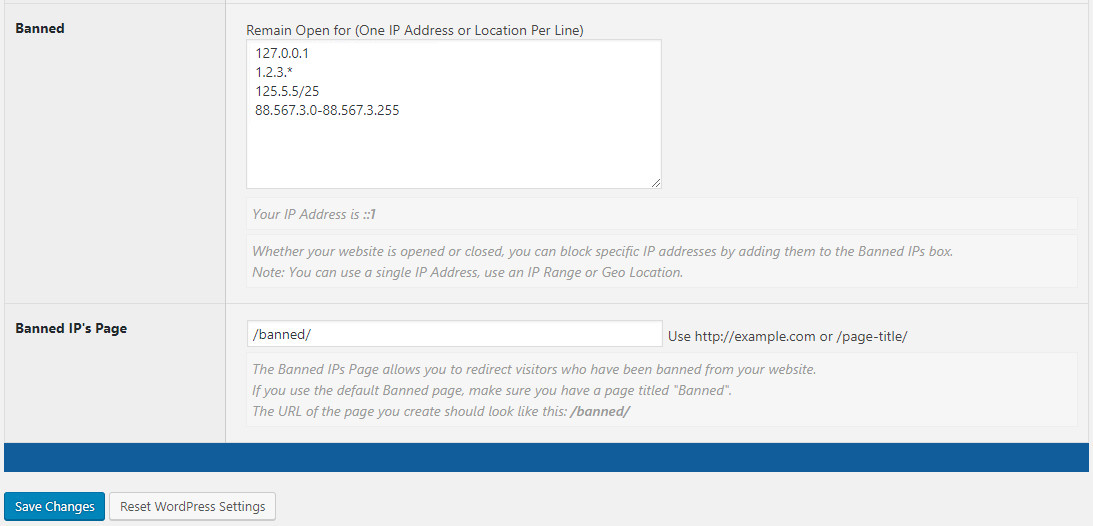
Banned:
Whether your website is opened or closed, you can block specific IP addresses by adding them to the Banned IPs box. Banned IP's Page: The Banned IPs Page allows you to redirect visitors who have been banned from your website. If you use the default Banned page, make sure you have a page titled "Banned". Note: Remember to click the 'Save Changes" button after making any changes. Please also noted that the "Reset WordPress Settings" will only reset the WordPress Settings. |
Proxy, VPN or Tor
Proxy, VPN or Tor Switch:
You can toggle 'on' to block Proxy, VPN or Tor visitor connections. These visitors will then be redirected to the Proxy, VPN or Tor page. Proxy, VPN or Tor Page: The Proxy, VPN or Tor Page allows you to redirect visitors who visit your website using Proxy, VPN or Tor connections. The default is /banned/ but you may want to use a page specifically for Proxy, VPN or Tor connections to let those visitors know they need to disable that to view the site. The URL of the page you create should look like this: /vpn/ |
Hosting or Data Center
Hosting or Data Center Switch:
You can toggle 'on' to block Hosting or Data Center visitor connections. These visitors will then be redirected to the Hosting or Data Center page. Hosting or Data Center Page: The Hosting or Data Center Page allows you to redirect visitors who visit your website using Hosting or Data Center connections. The default is /banned/ but you may want to use a page specifically for Hosting or Data Center connections to let those visitors know they need to disable that to view the site. The URL of the page you create should look like this: /hosting/ |
Do Not Log List
The Do Not Log List is a way for you to exclude visits from being logged in the Visitor Log. This works in the same way as the 'remain open for' and 'banned list' work but is for whether or not to log the visit. You can use IP Addresses, IP Ranges, Geo Locations or Bots in this list.
|
IP Range
Use a single IP or use IP Ranges:
1. Wildcard: 1.2.3.* 2. CIDR: 1.2.3.0/24 OR 1.2.3/24 3. Start-End: 1.2.3.0-1.2.3.255 You can add notes by adding // after the IP addresses. Example: 255.255.255.0 //add notes here |
Geo Location
Restrict Access by Geo Location:
You can restrict access to your site by using any of the following: City, Zip-Code, State/Region, State/Region Code, Country, Country Code(2 or 3 letter), ISP, Organization, Provider Number/Name or even Time Zone.** You can also use logical combinations, example: jacksonville, fl. usa |
Site Visitors Log
The Log displays the IP Address, linked to the GEO Location Map, the User Agent, Page Visited and the Date & Time of the visit. You can set your TimeZone on the Account page of our website.
This also shows if the IP Address is Allowed(Green Plus) or Banned(Red X) or Neutral(Grey Minus). Clicking the circle allows you to to easily add (or remove) the IP Address to the Banned and Allowed list. Delete: You can select IP Addresses from the list by selecting them, or by using the 'Select All' option. Visits are stored for 30 days. Per Page: The Per Page option allows you to select how many visits are siplayed in the log, the default is 20. If you would like to export the list, please log into your account with us and visit the IP Editor page > Site Visitors Log. |


